Showing posts with label thrift. Show all posts

Tuesday, July 12, 2016

Thrift Shopping in Tilbury, Ontario

We just got back from a week at a cottage on Lake Erie. It was a nice, relaxing week, with lots of time by the water, and a few jaunts into nearby towns.

My "thrifty splurge:" a 1960s cake/pie cover.  I plan to use it as a yarn cover because our cats love yarn as much as I do. It has just the right amount of wear and tear to make it the perfect piece.  I found this treasure at an antique store for $15.00.

"

There are no prices like Tilbury thrift shop prices! I got 2 quilting magazines for 25 cents a piece and the paperback novels were 2 for 25 cents. But the best deal was the "Soups of France" cookbook.  It had an $88.00 price tag on it...and it was also 25 cents!  In case your mental math is rusty, that's a grand total of  $1.25 for everything in this photo:


Next door to that thift store, there was another one. (I wish I could remember the names!)  There, Dan found...

...enough Mega Blocks to fill the dishwasher. (Can you think of a better way to clean toys?)  This was $3.

I found this amazing drinking glass with the first 100 years of Prime Ministers on it.  The tag said 75 cents, but the store owner told us it was on sale for 25 cents. (Deal!)


All told, $19.50 for some great finds.

Also, not thrift store related at all, but look!  We have houseplants now. They seem to love our kitchen window.  The cute little pots are from IKEA.


Friday, July 18, 2014

So much cool stuff!

I brought a carload of stuff to the thrift store this week.  Then--of course--I had to go inside and check things out.

Remember those grab bags of candy at the corner store when you were a kid?  Well, I found the thrifty fabric equivalent!  A $2.00 bag of mystery fabric--wrapped in no less than 20 feet of packing tape--was just too hard to resist.  It was packed too tightly to peek inside, but I figured I'd take my chances and spend the twoonie.
Packed to survive a nuclear blast.

This may be my best find yet!  It turned out to be...39 quilt patches in vintage fabric!

Get ready, patches!  I have so many plans for you... 
5 cents a patch.  So great!

Here's the rest of the stuff I bought:
Afghan - $4.00; onesie - $1.00; milk jug - $0.50; brand new baby shoes $3.00...and all those loooovely patches.
Now why would I buy an afghan when I can't seem to stop making them?  Well...it was gorgeous, it was finished, it was $4.00, and I can leave it on my porch without feeling guilty about it.  (It's acrylic, so it's easy to wash and it's not going to grow mold, either.)


Sooo....no more thrift shopping for at least a week!  Time to stay home and get this craft room organized so that I can start making beautiful stuff.

Wednesday, July 2, 2014

Another VV Victory

Summer holidays are here and I am officially in putter mode. Today's events included:
-getting a pedicure
-going out for lunch with a friend (Hi, Karen!)
-meeting a cousin for coffee (Hey, Corrie!)
-frittering away time in an air-conditioned Chapters
-sifting through treasures at Kitchener's other Value Village

Here's my VV haul:
-maternity jeans
-4 necklaces
-baby boy hoodie
-baby boy cardi
-baby boy military cap
...all for 30 bucks!


Look at the elbow patches on that cardigan!  And I love the hand-painted flower necklace.


Pedi'ed feet on the street (photo cred to Karen).

Saturday, June 21, 2014

I love thrift shopping


The school year is quickly coming to an end.  We've had some hot days, where I'm so exhausted melted by the end of it all, that I just draw the blinds in my classroom and head straight home.  On Thursday, I was away at a P.D. meeting--blessed with air conditioning and ice water for the full day--and I actually had energy left by the time I made it back to town.  On a whim, I hit up Value Village, hoping to maybe find a cheap piece of maternity clothing.  No luck there, but when you're thrift shopping, you always find what you're not looking for!

Here's most of the haul: two short-sleeved summer shirts for Dan...(That pink and aqua plaid one was a risk, but it actually looks so good on him!  He has attempted to wear it twice already, but agreed to let me wash it today before he wears it out in public)...and two too-cute baby beanies for our little bean.  (The Paul Frank one is my favourite...made of t-shirt material and only 99 cents.)

As I mentioned, no maternity clothes, but I did find this purse for me that had me singing the song from the VV commerical:

The find....THE FIIIIND!

It's made of candy wrappers and it's in mint condition...for $4.99.  VV isn't always the cheapest place to get stuff, but occasionally you find some really great deals!


The best part is many of the wrappers are not in English.  And it has several Ritter Sport wrappers, which were my obsession after our jaunt to Germany last year.


I don't know who made it or where it came from, but it has a functional zipper and sturdy purse hardware.  Can't wait to fill it up with all the necessities (book, phone, wallet) and head out on a little adventure!

Oh, and all this for $30.46.  Not too shabby...and all kinds of chic. ;)

Monday, June 3, 2013

Stratford's Goodwill Community Store - Kitchener Area Thrift & Vintage (Part 2)

When we want a change of pace, we go to Stratford.  Goodwill runs a great thrift store that's easy to access--right on Ontario Street, across from the mall.

Goodwill is the best place to find board games--specifically, all kinds of Trivial Pursuit editions--for my collection.  I've even purchased a few games still in the box with the cellophane on for less than 5 bucks.

On this visit, we were looking for bedside tables.  This store does not have a lot of furniture, but it does have a lot of everything else!  Here's what we found on our most recent visit to Stratford's Goodwill Community Store:


1.  "Tribal" necklace - $4.00
2.  Orange double-strand necklace - $4.00
3.  Three ornamental elephants - $1.00 each
4.  The Birdcage DVD - $4.00 (Dan's pick.  We watched it that night.  Pretty good!)
========
$15.00


I love the creamsicle colour of this necklace.  And the old-school clasp works beautifully.  The clasp says "Western Germany" on the back.  Can't say I have many things in my house that were made in Western Germany!


When I picked out these three little elephants, I thought they were all scratched up.  I planned to spraypaint them turquoise.  Once I got them home and washed them with dish soap,  I realized the "scratches" were just sticky stuff from price tags.  It came right off and they look as good as new.  While I decide whether to spraypaint them or not, they can wait happily on our bookshelf.

Thursday, April 11, 2013

Salvation Army Thrift Finds - Kitchener Area Thrift & Vintage (Part 1)

It's no secret that I love thrift stores.  Frankly, what's not to love?  They're environmentally friendly, easy on the wallet, and they hold all kinds of one-of-a-kind treasures.  When I met my now-husband and found out his favourite store was Value Village, that gave him a significant amount of points in my books.  When I introduced him to several other thrift and vintage stores in the area, I'm sure I gained points in his books, too.

More people should be using thrift stores!  It means less goes to the landfill.  It means meaningful employment for many local people.  Sometimes it means money for charity, too.

For these reasons (and probably more?) I bring you my first mini-feature on area thrift stores.

The Kitchener Thrift Store benefits the Salvation Army .  Located near Highland and Westmount in Kitchener, it's the closest thrift store to our house, so it gets most of our donations!  This store always has a lot of furniture.  I've been lucky a few times buying DVDs (including full seasons of TV shows) there, too.  They organize their housewares and knick-knacks by colour, so I always have fun wandering those aisles looking for things by colour palette.

My last trip was a brief one.  I needed an excuse to go out for a walk, so I set the Thrift Store as my destination.  My finds this time were simple, but great finds nonetheless:


1.  A white pitcher/vase for $1.99  (sells for $14.99 at IKEA)
2.  A large piece of cotton muslin for $3.99 (great for a practice run of the skirt I want to sew)
=====
$5.98 and no tax.  (I love that thrift stores have no tax!)


Eco Giftwrapping (a.k.a What To Do When You Have No Wrapping Paper!)

I recently wrapped up some scarves as gifts.  It was one of those last-minute, just-because things and as I rushed to wrap them before heading off to family Easter dinner, I realized my only traditional options were to wrap them in Christmas paper or stick them in oversized wedding-themed gift bags saved from our shower.

So, I went to the craft shelf and found...

...some vintage napkins, scrapbooking flowers, and straight pins.  (The napkins I used were beautifully pressed, but you'll get the idea with this leftover wrinkly one I used for the demo, won't you? ;)

To wrap the scarf:

1.  Fold the scarf into a square-ish bundle.


2.  Place the bundle in the centre of the unfolded napkin.

3.  Fold the napkin around the scarf, envelope-style.  (That is.... top down...


...bottom up...


...sides in.


4.  Secure it with a straight pin inserted through two paper flowers and pressed down gently into the fabric.


That's it!

By the way...
The whole bag of vintage napkins I bought cost me 50 cents.  Look at the beautifully tatted borders.  (Tatting is a kind of micro-crochet.  I don't have the patience for it, but can appreciate the time it makes to add those lacy borders!)  Some of them were clearly done by hand.  I love thrift stores!

Monday, December 24, 2012

'Tis the season...for wrapping gifts

I can't believe I found the time this week, but I'm glad I did!  I wrapped with paper, tissue, tape, string, ribbon, bows, and gift bags.  After about 5 hours, my lower back started to hurt, but I kept on going for just a little bit longer.  It's not that I had a ton of things to wrap, it's just that I had a lot of crafty fun with the process.

Here are a few peeks:

1.  Plain brown dollar store gift bags + simple black stamping = cute, unique, thrifty gift wrap.
The dollar store bags come in packs of 2 or three for a dollar.  The stamps are from Michael's for about $1.50 each.

2.  I've used the same ornament for about 4 or 5 weddings now, but I still love it.  The mirrored decoration is from the home decor aisle of the dollar store.  I wrinkled up and re-flattened tissue paper for the innermost layer, wrapped that in polka-dotted cellophane and wrapped that all up with a 2m x 40cm piece of silvery tulle.


Full Disclosure: Not everything got wrapped, I must admit.  In an act of true classiness, I handed two of my colleagues their gifts "wrapped" in the brown paper bags they came in from the LCBO. :)  They didn't seem to mind one bit!  Wrap some, leave some: it's all about balance, I guess. ;)

Saturday, July 28, 2012

Table Upgrade

Today was Spraypaint Saturday 2012.  (You didn't know it was Spraypaint Saturday?  Oh, don't worry: neither did I until the whim struck mid-afternoon!)  I had 4 projects on the go.  Take a look at project number one.

The biggest project of the day was an IKEA table upgrade.  A before shot would have been a good idea, but I guess I missed that step.  This came from Dan's bachelor pad: can you guess why it had been relegated to the basement storage room?

No, he's not a hobbyist butcher or anything.  It's a combination of tea and black cherry juice stains.  Pretty gross.
Step One was to sand the table top.  The stains were significantly reduced with some 100-grit sandpaper (leftover from my ongoing dresser redo) and then I wiped down the table with a damp, dish-soapy rag.


Step Two was to give the table a skirt, made of newspaper and painter's tape.  I had fun reading the sale flyers while I made the skirt (they only arrived this morning; there are some good deals at Shoppers Drug Mart this week, by the way).

I got smart this time and saved what's left of our sunburned lawn with plastic drop sheet.

Step Three was to prime the table top.  This was my first time using a spray-on primer.  It is surprisingly messy stuff!

Now, the original plan was to paint the tabletop with the leftover Peacock Blue cabinet paint, but when I read the labels on the spray cans and realized that I could spray over top of the primer after only 20 minutes, well...I grabbed some leftover black paint and made quick work of it.


Ta da!  My sophisticated, stain-free table is complete.  This is the start of the craft corner set-up in our rec room.
What is that black thing on the left?  It's Project Number Two, which should be dry enough to hang and share tomorrow.

Project Cost:
$0.00 for a table from the furnace room
$5.00 for a can of primer
$4.00 for 2/3 can of black spray paint
$2.00 for the drop cloth
====================
$11.00 craft table!  Hooray!

Monday, July 16, 2012

Busted: First Attempts At Jewelry

I've decided I'd like to start making jewelry this summer.  One of my first attempts involved diving into a big bag of buttons I've had in my desk drawer all year.  The goal was to make a necklace.  Black and white seemed like a good place to start, since it goes with everything.  I found a Youtube tutorial that made it look so simple, and I started by laying out the buttons how I wanted them.


Things started off okay.  I used 24-gauge wire and pliers, just as the crafter in the video recommended.  But about 1/3 of the way through, it broke!


I wasn't in the mood to start over, so i turned into a pendant.  Now I just have to figure out what I want to string it on to.


Not a 100% successful first attempt, but a good start!

Tuesday, May 22, 2012

Eight Dollars Well Spent

I went to the thrift store with my mom today.  I found mom a $20 Michael Kors lime green trench coat...and I found all of these treasures for me:

Clockwise, starting at 12:00, we've got:  4 polka-dotted bowls that match our mix-and-match IKEA dishes (50 cents each), one "Canadian Pacific Hotels" suit hanger (50 cents), a creamer (25 cents), a Crown mason jar (25 cents), a coral-y pink doily (50 cents), and a lamp base with a wrought-iron look (4 dollars).


 Here's the lamp base on its own.  I love those lines!


And here's the best part: the creamer matches the print on this sweet little bowl I found at a different thrift store a year ago.  We intended to go buy fabric (I'm going to attempt to make a dress!), but I couldn't find any fabric I liked.  Ah, well: after finding all this stuff, it didn't really matter!

Sunday, April 8, 2012

Makes: Easter Teacup Bunny, Egg Nest....and Messes


I've been starting to assemble some Easter decor in our house that I can pull out year after year.  I don't want to get to the point where there's an Easter bunny perched on every empty surface and a decorated egg balanced on top of that, but I do like the idea of having a few hints of the holiday hanging around.

Last Wednesday while browsing the shelves at The Salvation Army, I found a polka-dotted teacup in all shades of Easter.  (The stamp on the bottom says it's a Starbucks 2006 special edition; is it too soon to call it vintage? ;)

I crocheted a small stuffed bunny using some scraps from my stash.  The pattern is from Lion Brand's site. I opted out of putting a face on the bunny.  For some reason, I think it's cuter without a defined expression.  With a bunny for my cup, it's looking Easter-y indeed.


Cost of this project:

$1.99 for the teacup and saucer
$0.00 for the yarn and polyfil scraps from my (ever-shrinking, but still enormous!) stash
=====
$1.99

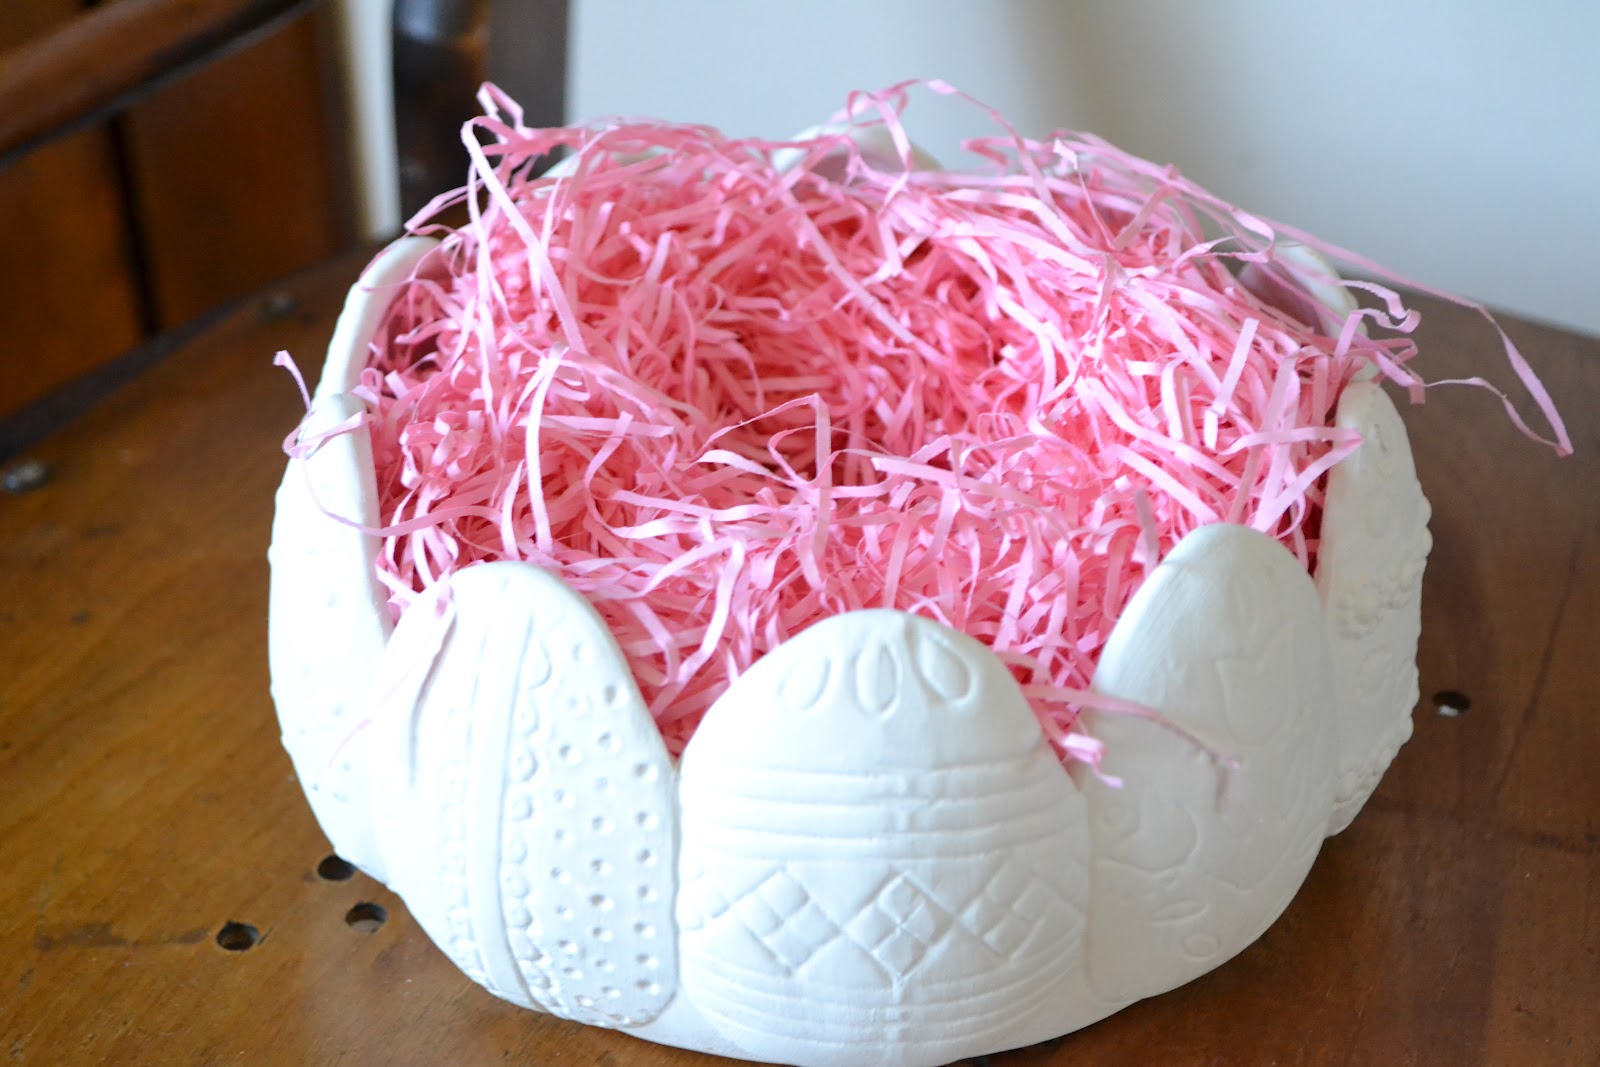
The last Easter feature for this year doesn't look as cute as it did when it was full of foil-wrapped chocolate eggs, but it's still pretty sweet.  I found the "bowl" at the MCC Thrift & Gift in Elmira a few months back.  I think it's the kind of thing that you can buy at a craft store and paint, but I like it all in ivory.

Cost of this project:


$2.00 for the bowl
$0.99 for the Easter basket grass
$1.29 for the Easter eggs that just....disappeared...
====
$4.28

...and now for the mess.  When we moved into our house about a year and a half ago, one of the things we wanted to change quickly was the wallpaper upstairs.  Not only was it pink flowers and blue ribbons, but it was nicotine-stained.  I'd been putting it off and putting it off because...well...everyone always groans about stripping wallpaper and how much work goes into it.


Today we (and when I say we, I mostly mean Dan...but I've been working, too!  In the ongoing battle of clean laundry vs. dirty laundry, clean is once again winning) stripped the wallpaper in the master bedroom in less than two hours.  It was a bit messy, but the project went quickly, using just fabric softener and hot water in a spray bottle.


Turns out our wallpaper was "strippable," which made the job easy.  This is yet another lovely thing about living in an older house!  The top layer with the design on it came off easily by hand.  Then we sprayed on the fabric softener and water, lifted the edge with a scraper, and the glue layer peeled away, slowly and satisfyingly, in nice, long sheets.  We purchased a few different "scrapers" to lift the wallpaper, but it turns out that the 3 for $1.29 plastic putty knives from Wal-mart worked best.  Go figure.  I peeled off an entire piece of wallpaper, floor-to-ceiling in one go.  I feel like a champion.

Blue walls, post-peel.

Right now the walls are a grubby robin's egg blue and the whole upstairs smells like Fleecy.  But all the glue is gone from the walls and the torn off paper is packed into a garbage bag and ready for curbside pickup!  Perhaps I'll even head to the hardware store tomorrow and get the paint we need to finish up the job. Grubby walls aside, it already feels much more up-to-date up there.

Shared on Visions of Sugar PlumsCraft Envy and The Crochet Way.

Wednesday, April 4, 2012

Go Your Own Way Easter Art


I work well with deadlines: the fact that Easter weekend is almost here was excellent motivation to complete a little craft project after school today.  These ten little woodcut bunnies were a dollar store find and I've been holding on to them since February.  Full directions are included below.


1.  Gather your materials: a picture frame, some scrapbooking paper, bunny cut-outs, glue tape, and a paper trimmer.  (Oh, and some ribbon, but that was an afterthought, so it didn't make the pre-craft photo!)


2.  Play around with colour combinations.  (I did like the purple bunnies on orange, but I wanted some kind of funky print.)

Crafting by lamplight.  It was dark by the time I got around to taking a photo!

3.  Trim a sheet of scrapbooking paper to 8x10 and place it in the frame.  (In true notMartha style,  I managed to break a nail and cut a finger while pulling apart the picture frame.  I learned that hubby's diabetic test strips make great little tools for folding back those pesky tabs on the back of picture frames without any damage to my finger!)  Use glue tape (or double-sided tape, or glue gun) to stick the bunnies right to the glass of the picture frame.  The geometric print paper made it very easy to line the bunnies up.


4.  I had to add a little non-conformist bunny in the corner...and give him a bright yellow bow to help him express his individuality.


How Much Did It Cost?

$2.00 for the frame
$1.00 for the bunnies
$0.00 for the glue tape, ribbon and scrapbooking paper from my stash
====
$3.00 (A Happy Easter, indeed.)


Shared on Someday Crafts, Our Delightful Home, Somewhat Simple, These Peas Taste Funny, A Diamond In The Stuff and Not Just A Housewife.
Related Posts Plugin for WordPress, Blogger...