All crafty, all the time. Mostly crochet, but I'm not a purist. ;)
Sunday, July 31, 2011
iPad Cover - My first blogged pattern! ;)
Lucky girl that I am, I got an iPad for my birthday this spring. I had to wait patiently for two weeks for my neat little toy to arrive, so when I realized that it would take another two weeks to order a case, I decided to make one myself. This is a first attempt, but it was a pretty good first attempt and has proven quite functional. It provides a decent amount of padding, without being bulky, and it's machine washable! Here is the pattern--my first written-out pattern ever!
Materials:
- 2 or 3 50g balls of worsted weight cotton yarn
- size H crochet hook
- 1 metre of elastic (about 0.75cm wide)
Directions:
Foundation Row: ch 38
Row 1: 1hdc in 3rd chain from hook; 1 hdc in each ch across.
Row 2: (ch 2, turn, counts as 1st hdc) 1 hdc in each hdc across
Row 3: (ch 1, turn, counts as 1st sc) 1 sc in each hdc across
Row 4: (ch 2, turn, counts as 1st hdc) 1 hdc in each sc across)
Repeat rows 3 and 4 until you have a rectangle big enough to wrap around your iPad completely, plus about 15 cm extra. This took 50 sets of rows 3 and 4 for me, but might vary depending on the brand of yarn and tightness of your crochet. Use your iPad as a guide.
Row 105 (or so): Ch 2, turn, counts as 1st hdc. 1hdc in each sc across.
Row 106: This is the row where you make the funky peekaboo spots for the elastic to slip through. (You probably could just continue with scs and hdcs in rows if you wanted...the elastic would likely thread through anyway. I didn't think of that at the time.) Ch 2, counts as 1st hdc. 1hdc in next hdc. *Ch 1. Skip 1 hdc space. 1 hdc in each of the next 3 hdc spaces. Repeat from * across.
Row 107: same as 105
Row 108: same as 106
Row 109: ch 1, turn. 1sc in each hdc or ch1 space across
Row 110: A row of shells to make a scallopy edge! Ch 1, 1 sc in next hdc. * Skip 2 hdc spaces. 5 dc in next hdc space. skip 2 spaces. 1sc in next hdc space. Shell made. Rep from * across. This should allow six shells to fit in perflectly.
Finishing:
Fold your rectangle like an envelope. The straight edge will be on the inside. The funky shelled edge is the flap. 1 sc around ALL the edges, including the bottom fold of the pouch. (This help it keep its shape.) Hold the edges of the inner part of the envelope together while you do your scs around the edge and sc them together to "sew" this portion of the flap closed.
Cut your 1m of elastic into two 50cm lengths. Thread each through one of the eyelet holes and stitch each one closed so it makes a loop. (Depending on the stretchiness of the elastic, you may need a little more or less than I did.
Done! :)
Saturday, July 30, 2011
Baby Beanies Sneak Peak
I've been mastering the art of baby beanies this week. I love the idea of a project that you can finish in half an hour! New mommies and mommies-soon-to-be take note and take your pick: something similar might be coming to a gift bag near you soon! I'll post the pattern links and instructions for my own creations someday, but I had to show off my progress. ;)
P.S. Leaving a comment below might just be enough to convince me to give you one of these cute little hats!
P.P.S. This is not a symptom of baby fever. I just became an auntie and had a photographer who is starting up ask for some photography props. Is that clear?!?! ;-)
P.S. Leaving a comment below might just be enough to convince me to give you one of these cute little hats!
P.P.S. This is not a symptom of baby fever. I just became an auntie and had a photographer who is starting up ask for some photography props. Is that clear?!?! ;-)
Friday, July 29, 2011
My New Hat - Fun With The Puff Stitch
Ready for fall! I've been working on hats for baby gifts (pictures to come) and I started getting jealous of all the fun hats these little people were going to have. This was yarn I bought to make an afghan earlier this year, but once I got it home I realized it didn't match the colours I had purchased already. Ah, well; it looks better in hat form, anyway!
This was my first experience with a puff stitch and I think it's my new favourite!
The yarn is Bernat Satin in "Teal." The pattern is from Vicki Howell's blog.
The Custom Details:
I love a pattern that's simple enough to make alterations to because, let's face it, I have a giant head. I made a 24" band instead of a 21" band. (Three inches! No wonder store-bought toques are headache-inducing.) This meant I started with 84sc instead of the 72 recommended for the regular size. (Simple math: add 4sc for every inch you add to the band, or take away 4sc if you wanted to make it an inch smaller.) Likewise, I kept crocheting until the hat was about 12.5" in length, instead of the specified 11" to account for the extra space my large noggin would occupy.
Cost: About $6.00 worth of yarn and 6 hours worth of time. (Did I mention I watched TWO movies yesterday? Did I mention that I love summer vacation?)
Thursday, July 28, 2011
Spraypaint Success!
The fastest way to transform something from ugly into updated? Spray paint. :) Here are two projects from a recent Spraypaint Sunday.
The first project took all of about 60 seconds, including the time to hang it on the wall. A somewhat tacky metal Christmas card display "wreath" became a year-round wreath after I removed the metal bow and sprayed it with bright yellow paint. It looks very happy on our office wall. (Now send us lotsa photos and postcards so we can fill it up, okay?)
Here is the wreath before...
...and here it is after!
The second is a set of candlesticks. I haven't decided if they're a centrepiece for the dining room table or a funky bookshelf decoration. Anyway, they're all re-used items. Two of the big candlesticks came from hubby's weird collection of stuff. The other four were purchased from the thrift store for $0.50 to $1.50 each. The tray cost a whopping $0.50, too (ugly print, but a neat shape).
Please try this at home! If there is any wax left on the candle holders, just put them in a freezer for a few minutes and then pop it off with a butter knife. Use a damp rag to wipe off any dust or grease and get to spraying. ;) (Don't forget to wear gloves....remembered that this time! Also, make sure the drop cloth you're using for spraypainting completely covers your work surface. We have black, white and schoolbus yellow patches of grass in the backyard right now.)
Total cost of the 1st project:
$2.00 for the wreath
$1.00 for 1/5 of a can of spray paint
-----
$3.00
Total cost of the 2nd project:
$4.50 for the candle sticks and tray
$0.00 for the candle sticks I found in the basement. ;)
$2.50 for the 1/2 can of spray paint
-----
$7.00
Monday, July 25, 2011
Sheet Music Art
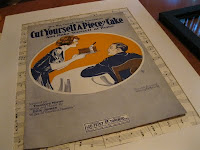
I love the simple graphics and designs on old sheet music. When I came across this particular piece of 1920s schmaltz, titled "Cut Yourself a Piece of Cake and Make Yourself At Home," I was instantly struck with an idea of how to incorporate it into our dining room. (It's hanging right above the piano, of couse!)
The pictures below should make this project pretty simple, if you wanted to try it yourself. Simply cut off the cover (I used my Fiskars paper trimmer) and then slice the actual sheet music into smaller pieces to collage together as a background. I purchased a frame that came with a mat and used double-sided tape to secure everything to the sample picture that came in the frame.
Cost of the project:
$0.50 for the sheet music at the thrift store
$17.99 for the frame (on sale)
-------
$18.49
1. Attach sheet music bits to the sample picture that comes in the frame...
2. Centre the sheet music cover over the collage. Use double-sided tape to secure it in place...
3. Lay the matting over top to make sure you haven't missed covering any visible spots. (No need to tape this part.)
Subscribe to:
Posts (Atom)