Tuesday, May 22, 2012

Eight Dollars Well Spent

I went to the thrift store with my mom today.  I found mom a $20 Michael Kors lime green trench coat...and I found all of these treasures for me:

Clockwise, starting at 12:00, we've got:  4 polka-dotted bowls that match our mix-and-match IKEA dishes (50 cents each), one "Canadian Pacific Hotels" suit hanger (50 cents), a creamer (25 cents), a Crown mason jar (25 cents), a coral-y pink doily (50 cents), and a lamp base with a wrought-iron look (4 dollars).


 Here's the lamp base on its own.  I love those lines!


And here's the best part: the creamer matches the print on this sweet little bowl I found at a different thrift store a year ago.  We intended to go buy fabric (I'm going to attempt to make a dress!), but I couldn't find any fabric I liked.  Ah, well: after finding all this stuff, it didn't really matter!

Sunday, May 20, 2012

To do this summer: try a craftsy course, possibly this one to do some funky quilting.

Tuesday, May 1, 2012

Fibres Crocheted While Watching A Few Hours of Downton Abbey

I tried to be a little Wordsworthian in my blog post title.  If I didn't succeed, there's no need to tell me so. ;)

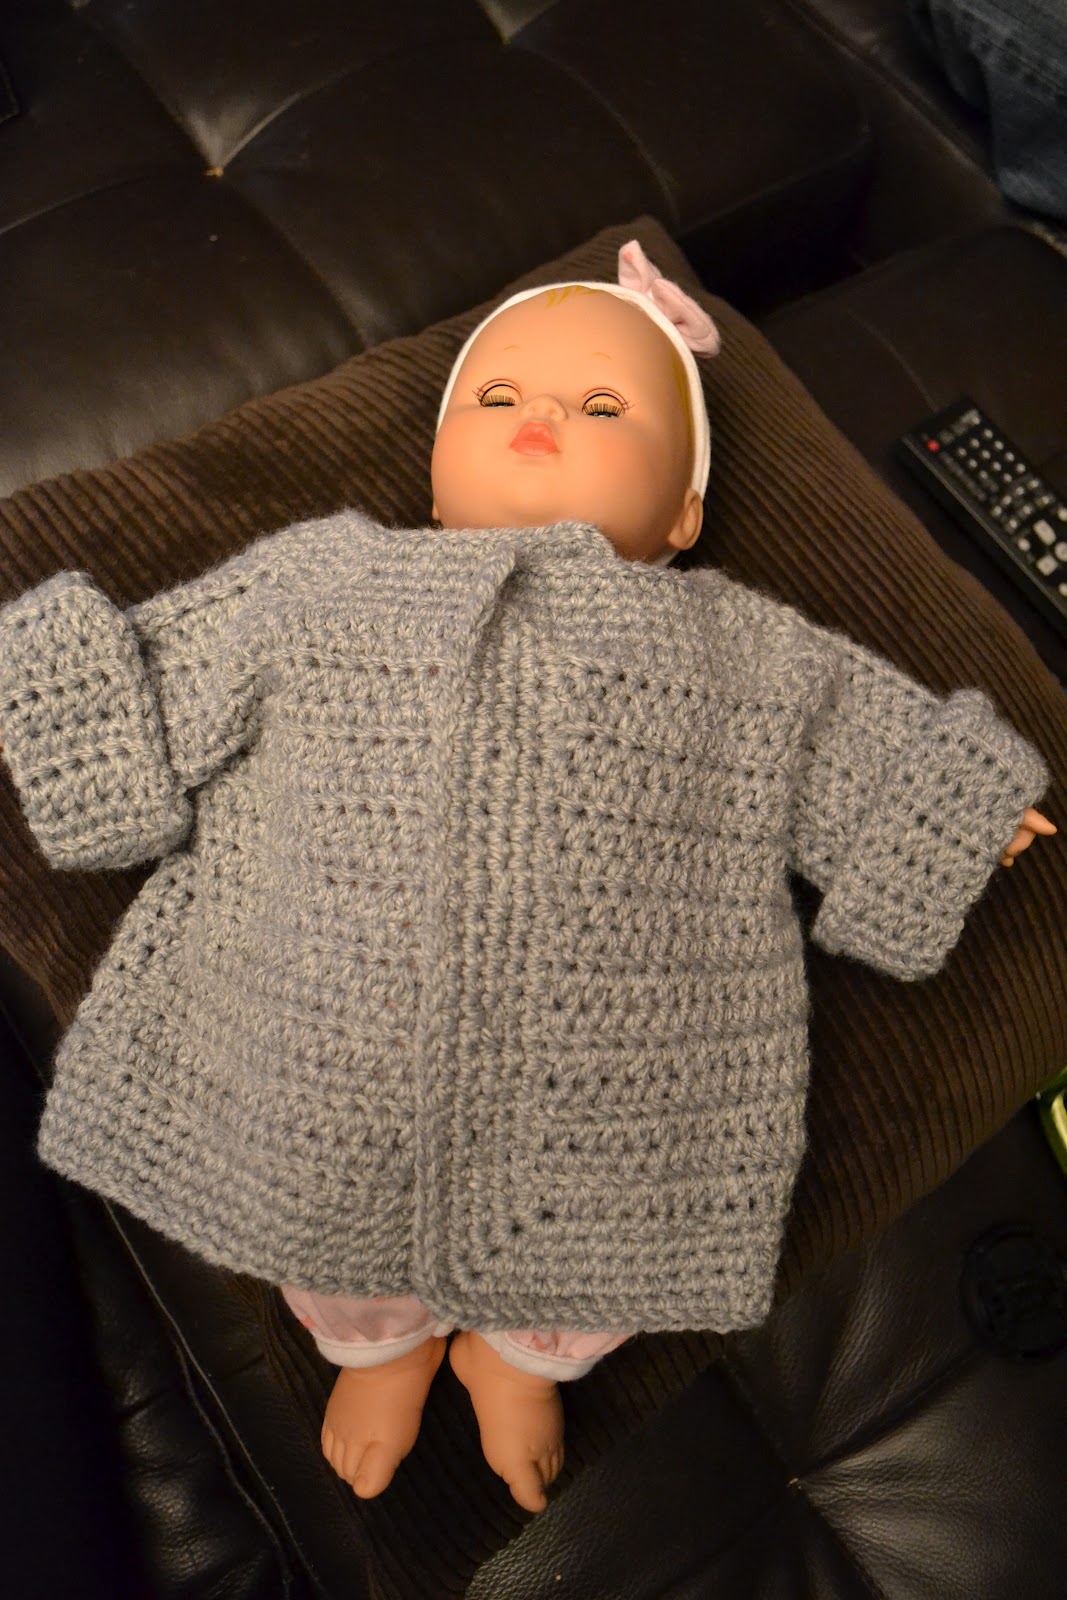
I'm calling this my Downton Abbey Jacket not because it necessarily looks like anything that might be worn on the show, but because I watched the entire first season of the show while completing this project.
Thanks to my niece, Maddy, for loaning me her baby doll for the big photo shoot.


People often ask how long it takes me to complete a project.  This little jacket was worked up mostly in one day, but it was a very relaxed day.  Before attaching the buttons, I was at 6.5 hours of work crocheting, sewing seams, and working in ends.  This was my first sweater.  I've often looked at them and thought they just seemed too complicated, but I liked the idea that this one was all crocheted in one piece.

I documented the jacket creation step-by-step to show just how easy crocheting a project like this can be.  The biggest tool to have in your tool box for a project like this?  A measuring tape.  You can pick up a cute retractable one at the counter of your favourite fabric store, or you can keep your eyes out for a freebie like this one (given out from an insurance sponsor at a teacher meeting I attended last year).  Actually, a measuring tape gives me no more excuses about staying away from symmetrical projects.  (Socks, mittens, gloves: watch out here I come!)

The pattern is a simple one from Lionbrand.com.  It's crocheted using an I hook and Bernat Softee Baby yarn in "Flannel."  One ball is enough to make the the sweater and it looks like there's enough left over for a hat and maybe even a pair of booties or no-scratch mittens.  It was meant to be a 0 to 6 months size, but I think it might be more of a 6-12 months...hence the oversized look on the teeny baby doll.

Construction begins with a simple rectangle.

Add additional chains to one side and work back across.

Once you reach the other side, extend past the rectangle with extra chain stitches.  Then turn and stitch all the way back across.

This makes the back of the sweater and the back of the sleeves.

Extend the sleeve on one side.  (This is the front of the sleeve.)

Extend down the front of one side and fasten off.

Join on the other side and extend down to complete the rest of the front of the jacket.

Here's what the main piece of the sweater looks like.  All one piece!  Nice and easy. :)

Fold over and stitch the side seams and sleeve seams closed.

Stitch around the collar, lapels, and bottom of the jacket

Stitch several rows (around 6) for cuffs.

Here's the completed jacket.  All it needs is some buttons!

Thursday, April 19, 2012

It's the Little Things...

Remember when you were in elementary school and wished you could invite your whole class to your birthday?  Yep, that's the real reason I became a teacher.  I threw myself a "birthday party" today at recess: everybody got a cupcake and nobody got turned away.

Love this gadget for scooping same-size cupcakes.  It was a hand-me-down, and I'm not sure if it's an icecream scoop, but it's awesome!
I made chocolate and rainbow chip cuppies with fudge frosting, purple frosting, and sprinkles sprinkled everywhere!  Cake decorating isn't my craft (although I'm pretty good at cake eating), and I'm definitely not above baking from a box.  These are just your basic cupcakes, but I think they look rather pretty in their simplest form.


Maybe one day making army-sized batches of cupcakes will get old.  Maybe one day I'll be rolling my eyes at the batches of cupcakes I'm baking for someday school events for my someday kids, but for now (and the past four years--hah!--it's tradition) I'm loving it.  A few minutes with the mixer is worth it.  And you only turn 30 once.  Three decades, baby!


My students made my day extra special.  There were several homemade cards (aren't those just the best?), and a few even suprised me with flowers and jewelry!  Technically my birthday's tomorrow...but that's a PD Day...and I'm not above celebrating for a few days! :)

Apparently yellow roses symbolize admiration. (Aw!)

Garden flowers in an improvised vase.  (They smelled so good!)

Beads from Zimbabwe.

Monday, April 16, 2012

Happy Hedgehog Blankie

Red is a happy colour of yarn to work with!  Here's a recently finished project, in soft but practical Bernat Babycakes yarn (a cotton/acrylic blend).  I'm calling it a Happy Hedgehog blankie because of the cute and spiky edges.
I am also having fun with my camera these days and took no less than 42 shots of this blanket.  Of course, that was yesterday.  Today, after 14.5 straight hours of working (love my, love my, love my job!), it's all I can do to upload two photos.  I think I'm working in slow motion here.


Monochrome is a good look for blankets...but then again, so is two-toned and multi-coloured.  (Yes, this is yet another variation of an "old standby" crochet pattern!  Amazing how fibre and colour changes everything.)

Shared on The Crochet Way, iCrochet and Skip to My Lou.

Monday, April 9, 2012

Knowing What I'm Not

You probably didn't really need a sign to figure that out.  A cursory glance around my house will reveal the dust bunnies, mirror smudges, discount grocery labels and mismatched socks of which the Queen of Good Things would not approve.

I do have an Aunt Martha, and she's absolutely lovely, but it does make me smile every time someone calls me Notmartha.  I have nothing against The Martha.  I actually enjoy reading her magazine, visiting her website, and using her line of crafting products.  I'd just rather be considered an occasional vacationer in, rather than a citizen of, her brand empire.

We found this sign at a second-hand/antique barn in Bloomfield, ON whose name I have already forgotten.  We paid $3.00 for it, but I couldn't bear to leave it behind.  It hearkens back to the glue-gun-and-fake-flowers days of 1992 (Hello, Girl Guides years!), but I'm thinking there's a place for it in my craft den.  I'm also loving that, after a year of blogging, I'm still crafting away in an unMartha-enough way that Dan was just busting with excitement when he found the sign.

I'm loving the blog life--every navel-gazing bit of it.  It keeps me writing and crafting, so I'm creating every day.  I'm finding all kinds of people out there with similar interests and even brighter ideas; frankly, it's healthy and happiness-inducing to have a hobby...or even a few.  I've even (very) recently resurrected my book blog with the hope that it will motivate me to give more attention to the books that fill my work and play time.

My goal for my next bit of time blogging is to learn how to use some of the features of my camera and start taking some really great pictures.  Here's hoping for many days of great weather (and unMartha'd ideas) ahead.

Sunday, April 8, 2012

Makes: Easter Teacup Bunny, Egg Nest....and Messes


I've been starting to assemble some Easter decor in our house that I can pull out year after year.  I don't want to get to the point where there's an Easter bunny perched on every empty surface and a decorated egg balanced on top of that, but I do like the idea of having a few hints of the holiday hanging around.

Last Wednesday while browsing the shelves at The Salvation Army, I found a polka-dotted teacup in all shades of Easter.  (The stamp on the bottom says it's a Starbucks 2006 special edition; is it too soon to call it vintage? ;)

I crocheted a small stuffed bunny using some scraps from my stash.  The pattern is from Lion Brand's site. I opted out of putting a face on the bunny.  For some reason, I think it's cuter without a defined expression.  With a bunny for my cup, it's looking Easter-y indeed.


Cost of this project:

$1.99 for the teacup and saucer
$0.00 for the yarn and polyfil scraps from my (ever-shrinking, but still enormous!) stash
=====
$1.99

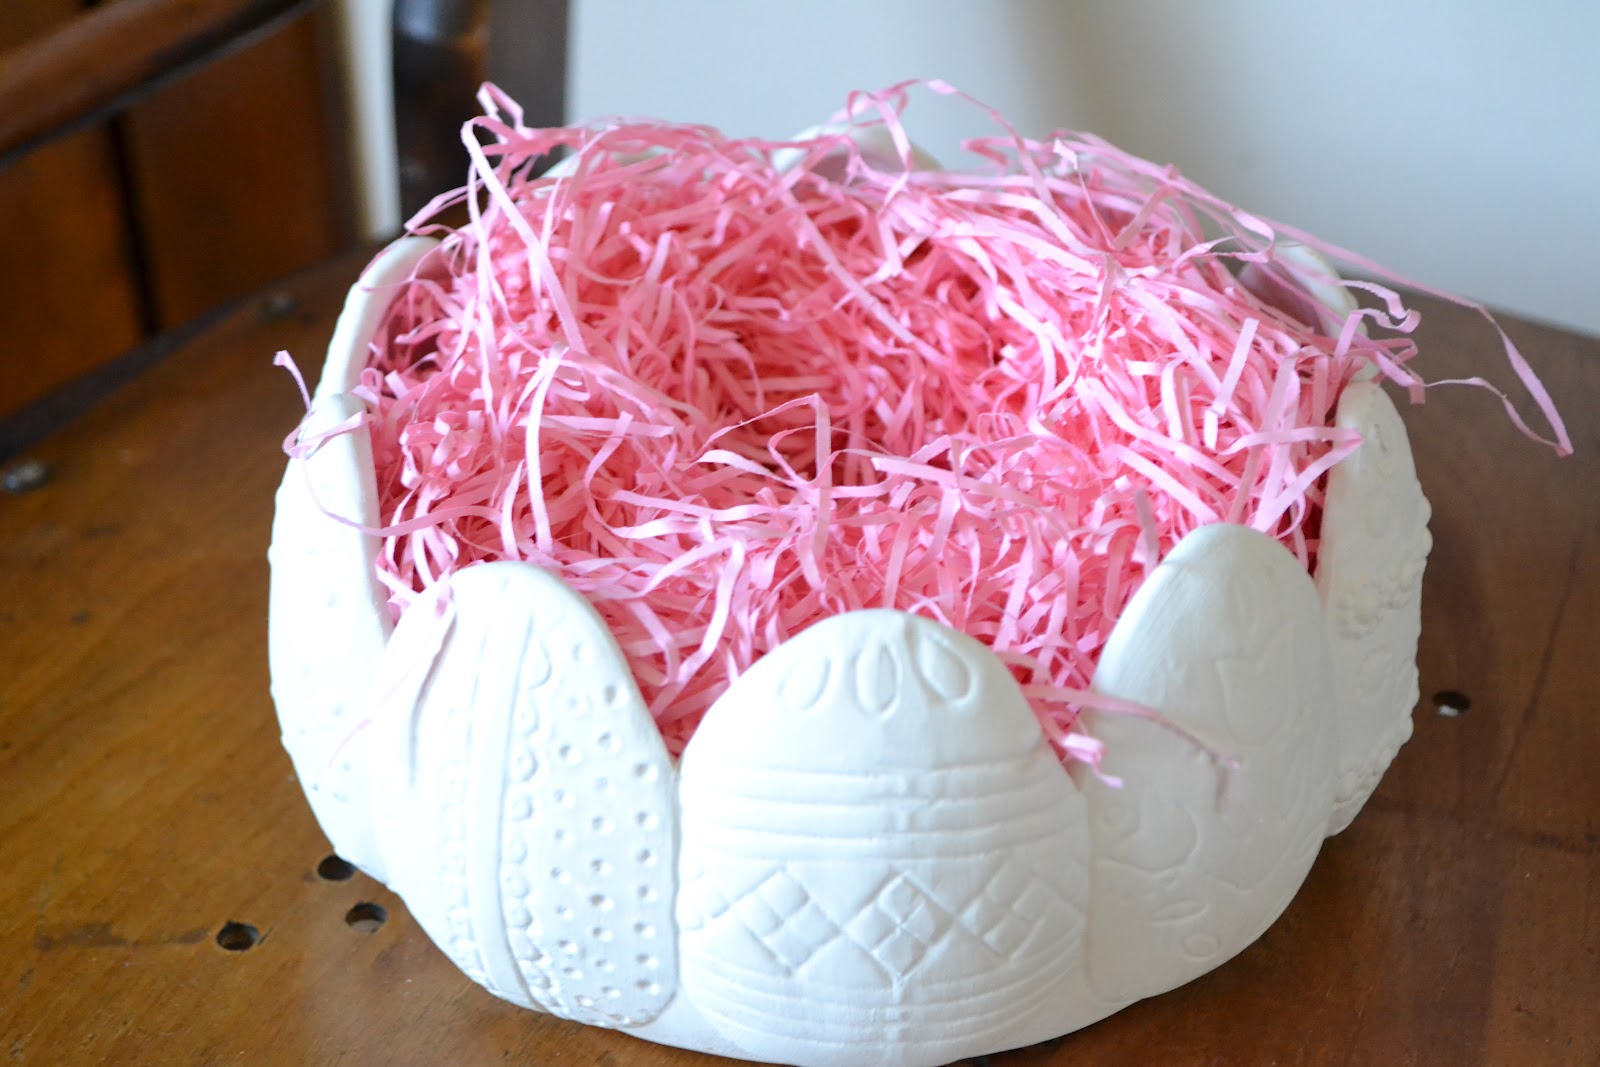
The last Easter feature for this year doesn't look as cute as it did when it was full of foil-wrapped chocolate eggs, but it's still pretty sweet.  I found the "bowl" at the MCC Thrift & Gift in Elmira a few months back.  I think it's the kind of thing that you can buy at a craft store and paint, but I like it all in ivory.

Cost of this project:


$2.00 for the bowl
$0.99 for the Easter basket grass
$1.29 for the Easter eggs that just....disappeared...
====
$4.28

...and now for the mess.  When we moved into our house about a year and a half ago, one of the things we wanted to change quickly was the wallpaper upstairs.  Not only was it pink flowers and blue ribbons, but it was nicotine-stained.  I'd been putting it off and putting it off because...well...everyone always groans about stripping wallpaper and how much work goes into it.


Today we (and when I say we, I mostly mean Dan...but I've been working, too!  In the ongoing battle of clean laundry vs. dirty laundry, clean is once again winning) stripped the wallpaper in the master bedroom in less than two hours.  It was a bit messy, but the project went quickly, using just fabric softener and hot water in a spray bottle.


Turns out our wallpaper was "strippable," which made the job easy.  This is yet another lovely thing about living in an older house!  The top layer with the design on it came off easily by hand.  Then we sprayed on the fabric softener and water, lifted the edge with a scraper, and the glue layer peeled away, slowly and satisfyingly, in nice, long sheets.  We purchased a few different "scrapers" to lift the wallpaper, but it turns out that the 3 for $1.29 plastic putty knives from Wal-mart worked best.  Go figure.  I peeled off an entire piece of wallpaper, floor-to-ceiling in one go.  I feel like a champion.

Blue walls, post-peel.

Right now the walls are a grubby robin's egg blue and the whole upstairs smells like Fleecy.  But all the glue is gone from the walls and the torn off paper is packed into a garbage bag and ready for curbside pickup!  Perhaps I'll even head to the hardware store tomorrow and get the paint we need to finish up the job. Grubby walls aside, it already feels much more up-to-date up there.

Shared on Visions of Sugar Plums, Craft Envy and The Crochet Way.
Related Posts Plugin for WordPress, Blogger...