
This thing feels SO GOOD around my neck that I'm wearing it while I type this post. Soft, plush and cozy: it's like wearing a teddy bear. :)
MATERIALS REQUIRED FOR THIS PROJECT:
- approximately 50g of "regular" yarn (I used some mill ends--I think it was Bernat Super Value, but something like Redheart Super Saver or Loops & Threads Impeccable or Vanna's Choice would work, too)
- 2 balls of Loops & Threads Pom-Pom yarn in "Outdoors"
- size N crochet hook (or something similar)
- size I crochet hook
This project is crocheted in two stages. First you make the "base" using the larger hook and the regular yarn. This will show through a teensy bit so pick a neutral colour or one that matches your pom-pom yarn. After the base scarf has been created, you "cover" it with pom-poms. So fun.
TO MAKE THE "BASE:"
Using the N hook and the regular yarn...
Foundation row: chain 12.
Row 1: dc in 4th ch from hook. dc in each remaining ch. This will give you 9 complete dcs and a ch 3 at the start of the row. (ch 3 always counts as 1 dc). Ch 3. Turn.
Row 2: ch3 from previous row counts as 1st dc. dc in each remaining dc across. (10 dc)
Repeat row 2 until scarf reaches desired length. (For me, this was 50 rows.) Fasten off.
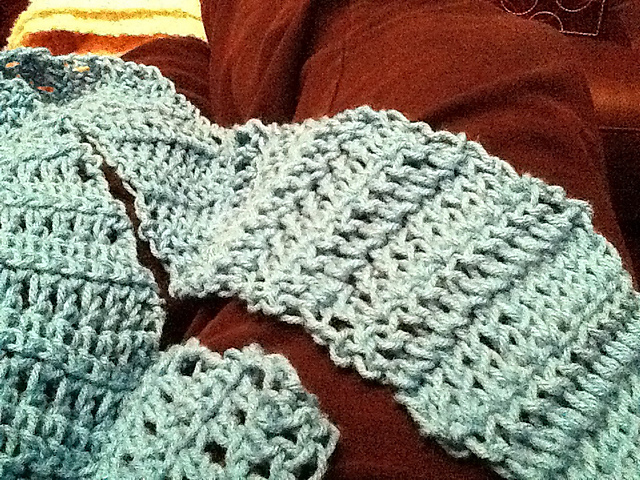
The "base" itself will look pretty pathetic. Here's a photo I took with my iPad:
NOW COMES THE FUN PART!
Working with the pom-pom yarn was a bit tricky at first, since you can't really hold it like regular yarn and you need to keep flipping to check out the front and back sides of the project. It's also important to remember that you're only crocheting the bits that I call the "gap yarn"--the spaces between the pom-poms. Don't pull any pom-poms through! Keep them all on the front side of your work. Once you get the hang of it, things will start moving faster. Keep patient for the first few rows.
Using the I hook, join pom-pom yarn with a sl stitch to the first ch in the foundation row. Working through the back of the scarf base, skip three pom-poms and work a sl stitch into the 2nd chain of the scarf base using the gap yarn between the 3rd and 4th pom pom.
Skip 3 more pom-poms and join again using a sl stitch and the gap yarn between the 3rd and 4th pom-pom. Continue across the row (10 sl stitches).
Once you reach the end of the row, use 2 sl stitches and the same "skip 3 pom-poms" technique to travel up to the first row of dc stitches. Work one sl stitch into each dc across, continuing with the "skip 3 pom-poms" technique to create loops on the front side.
As you continue working, you'll notice that the sl stitches form an "S" pattern ont he backside of your scarf like this:

Not to worry....the meshy-ness of the loosely crocheted base and the weight of the pom-pom yarn will cause the scarf to curl in on itself. Rather than seeing the backing, you'll simply see a tube-like scarf with pom-poms all around, like this:
 v
vCool, huh?
COST OF THE PROJECT:
$0.00 for the "base" yarn (do you recognize it as scraps of scraps from my flower pillow?)
$10.00 for two balls of the pom-pom yarn (purchased on sale of course--with about 1/3 ball leftover)
=====
$10.00 - Nice. :)
(Takes approximately 2-3 hours to complete.)
And now for the official part:
©2011 Lyndsay Buehler, all rights reserved. You may sell items made with this pattern, but if you sell them online, you must link to this pattern. You may not sell this pattern or claim it as your own. You may publish or post a link to this pattern, but you may not publish or post this pattern in whole or in part.
Wow....you are a genius! Love this, and have to make it...different and fun. How could anybody be in a bad mood when they wear this?? Thanks for sharing - the technique is new to me and will give me a chance to learn something different.
ReplyDeleteThanks, Juli! I'm looking forward to cooler weather, just so I can wear it. :)
ReplyDeleteAwesome! And welcome to Fibers on Friday!! I hope to see you back again and again!! I love your blog name!!
ReplyDeleteSOME LOOPY POM-POM YARN WAS GIVEN TO ME AND I SEARCHED AND FOUND YOUR PATTERN.
ReplyDeleteTHANKS YOU SO MUCH FOR THE PATTERN..LIKE YOU SAID IT WILL TAKE YOU A FEW TIMES BUT EVENTUALLY YOU WILL GET THE HANG OF IT...IT IS MY FAVORITE "WICKED" FEEL GOOD SCARF.SO HAPPY YOUR PATTERN WAS STILL AVAILABLE....BEVERLY FRENCH.